
What Does the Interior Renovation Process Involve?

The interior renovation process is a sequence of planned phases that moves from design and permitting through demolition, mechanical rough-ins, drywall, finishes, and final inspections to transform a space without costly rework. Understanding what does interior renovation process involve before breaking ground is the single most effective way to protect your budget and timeline. Homeowners and property managers who skip this overview routinely face expensive surprises. The phases are interdependent, meaning one missed step forces you to undo completed work downstream.
What are the main stages in the interior renovation process?
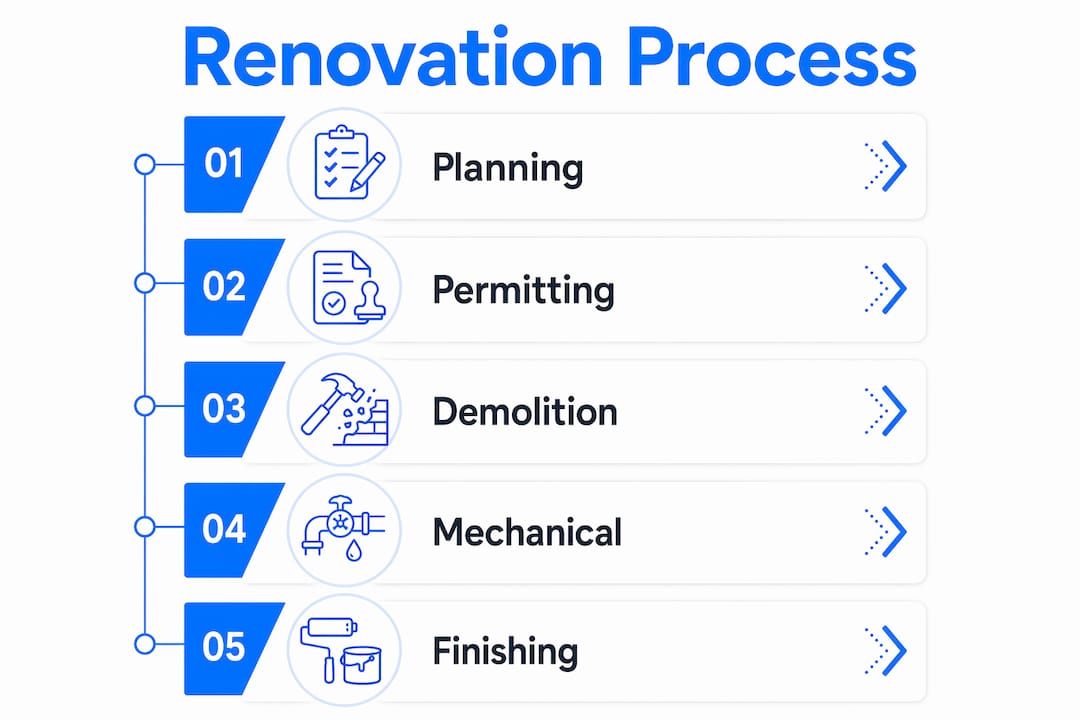
The interior renovation sequence begins with design and permits, moves through demolition and rough-in mechanical work, then insulation and drywall, and closes with finishes and inspections. Each stage is a gate. You cannot close walls before passing a rough-in inspection, and you cannot install flooring before painting ceilings. Knowing the full order before day one prevents the most common and expensive mistakes.
Here are the core home renovation phases in sequence:
Planning and design. Define the scope, set a budget, select materials, and establish a timeline. Involving an interior designer early aligns design intent with construction reality and reduces costly layout mismatches before a single wall comes down.
Permitting. Submit applications for any structural, electrical, plumbing, or HVAC work. Permit timelines vary by municipality but typically run two to six weeks.
Pre-construction preparation and demolition. Clear the space, protect adjacent surfaces, and remove existing finishes, fixtures, or walls as specified in the scope.
Mechanical rough-ins. Electricians, plumbers, and HVAC technicians run new wiring, pipes, and ductwork through open wall and ceiling cavities.
Insulation and drywall. Once rough-in inspections pass, insulation goes in and drywall closes the walls. This is a one-way door. Nothing gets corrected cheaply after this point.
Interior finishes. Painting, cabinetry, flooring, trim, countertops, and fixtures are installed in a specific order to prevent damage and rework.
Final walkthrough and inspections. A punch list documents incomplete or defective items. Final municipal inspections confirm code compliance.
Pro Tip: Create a one-page project schedule before demolition begins. Pin it to the wall of the job site so every trade knows what comes before and after their work.
Why is proper sequencing important in interior renovation projects?
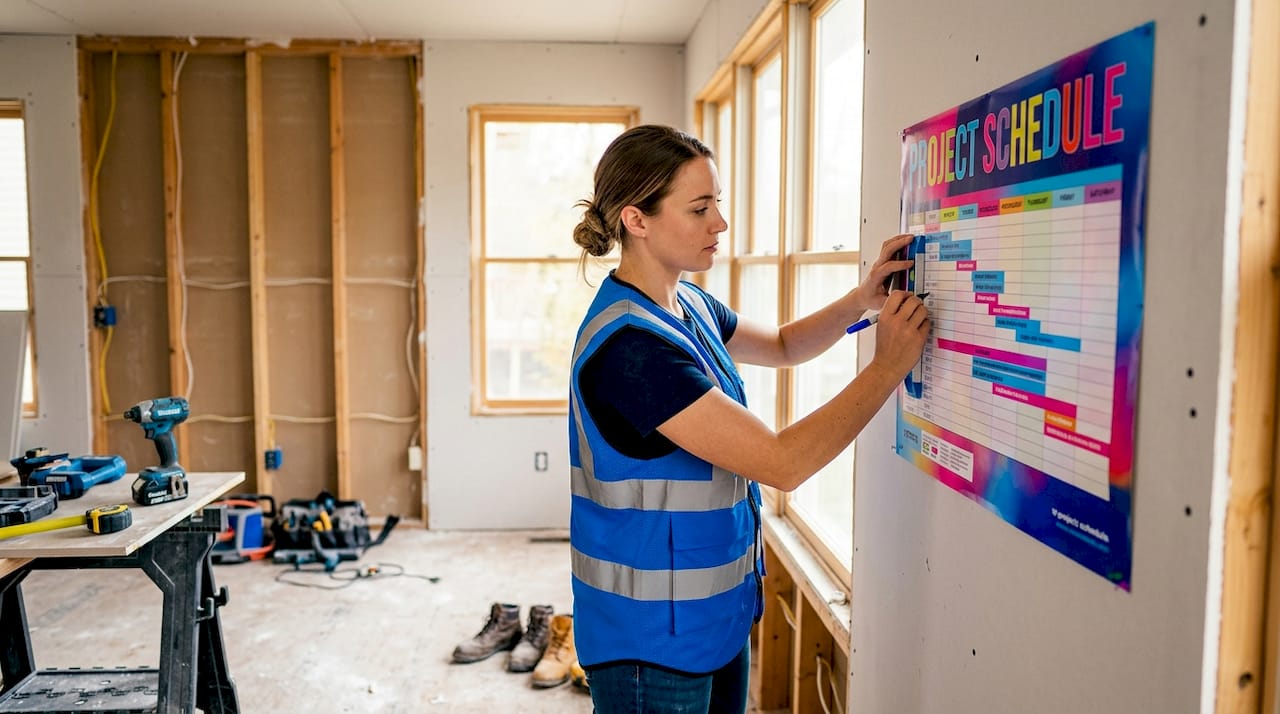
Sequencing is the difference between a project that finishes on time and one that bleeds money for months. Renovation timelines coordinate trades in the right order to prevent gaps and costly delays, and adding buffer time to accommodate setbacks is a non-negotiable best practice. A single trade working out of order can force three others to redo completed work.
The most common sequencing failures in the interior remodel process include:
Flooring installed before painting. Drips and scuffs on new hardwood or luxury vinyl plank require sanding, refinishing, or replacement.
Drywall closed before inspection. Municipalities require a rough-in inspection before walls are closed. Skipping it means opening the drywall again at your expense.
Countertops templated before cabinetry is set. Countertop fabricators template from installed cabinets. Templating early produces slabs that do not fit.
Fixtures delivered too early. Plumbing and light fixtures sitting on a job site for weeks get damaged, stolen, or lost in the chaos of active construction.
Backordered materials and subcontractor delays are the leading causes of project stalls, and both are predictable with early planning. A tile you love that ships from overseas in 10 weeks will stop your flooring crew cold if you order it after demolition starts.
“The cost of rework in residential renovation is not just financial. It erodes trust between the homeowner and the contractor, and it compresses the schedule in ways that force shortcuts elsewhere.” — Common observation among experienced renovation project managers
Understanding how to sequence projects effectively is the skill that separates a smooth renovation from a painful one.
How do inspections and permits fit into the renovation timeline?
Permits and inspections are not bureaucratic obstacles. They are the legal framework that protects your investment and your ability to sell the property later. Skipping permits for structural, electrical, plumbing, or HVAC work can result in fines and serious complications at resale. Buyers’ lenders and inspectors will find unpermitted work, and the remediation cost falls entirely on the seller.
Renovation type | Permit typically required | Inspection timing |
Structural wall removal | Yes | Before and after framing |
Electrical panel or wiring | Yes | After rough-in, before drywall |
Plumbing rough-in | Yes | After rough-in, before drywall |
HVAC replacement or addition | Yes | After installation |
Cosmetic finishes only | No | Not required |
Electrical and plumbing inspections occur after insulation and rough-in work but before walls are closed. This inspection acts as a hard gate in the schedule. Your drywall crew cannot start until the inspector signs off. Build two to five business days of buffer around every scheduled inspection because inspectors operate on their own timelines.
Pro Tip: Request your permit at the same time you finalize your design drawings. The permit approval period is dead time in the schedule. Use it to order long-lead materials so they arrive when demolition ends.
What practical steps can homeowners and property managers take to prepare?
Preparation before the first crew arrives determines how smoothly the entire project runs. Early coordination of electrical, plumbing, lighting, and HVAC layouts saves significant time and money because changes are cheap on paper and expensive in the field. The following steps apply whether you are renovating a single bathroom or an entire floor.
Clear and protect the work area. Move furniture out of the renovation zone entirely. Cover adjacent floors and surfaces with rosin paper or plastic sheeting. Homeowners who protect floors and manage dust during active work reduce cleanup time and prevent damage to finished areas.
Hire and vet your contractors. Check licenses, insurance, and references before signing any contract. Get itemized bids, not lump-sum estimates, so you can compare line by line.
Order materials before demolition. Cabinets, tile, windows, and specialty fixtures often have lead times of four to twelve weeks. Order them the day your permit is submitted, not the day your walls come down.
Set a realistic timeline with contingency. A kitchen renovation that a contractor quotes at four weeks realistically takes six when you account for inspection delays, backorders, and weather. Build a 20 percent time buffer into every phase.
Plan your living arrangements. If a kitchen is out of commission, set up a temporary cooking station. If a bathroom is the only one in the home, sequence the work so it is never fully offline for more than one day.
Schedule a third-party inspection before final payment. A licensed home inspector reviewing completed work before you write the final check catches deficiencies that are far cheaper to fix while the contractor is still on site.
Read Manycolorswi’s guide on preparing your home for renovation work before your project begins. It covers dust management, contractor communication, and protecting finished spaces in detail.
Pro Tip: Keep a shared digital folder with your general contractor containing the project schedule, permit documents, material order confirmations, and inspection reports. When a dispute arises, documentation resolves it in minutes.
What does the finishing stage involve and what order does it follow?
The finishing stage is where most of the visible transformation happens, and it is also where the most rework occurs when the order is wrong. Finish-stage work follows a strict sequence: paint first to protect flooring, cabinetry installation before countertop templating, then trim and fixtures last to avoid damage. Violating this order costs real money.
Finish task | Comes before | Reason |
Ceiling and wall paint | Flooring installation | Drips and overspray damage finished floors |
Cabinet installation | Countertop templating | Fabricators measure from set cabinets |
Countertop installation | Sink and faucet rough-in | Plumber needs countertop in place |
Trim and baseboard | Final paint touch-ups | Trim gets caulked and painted in place |
Light fixtures and hardware | Final walkthrough | Last items installed, first items noticed |
Painting choices also affect the final feel of a space more than most homeowners expect. Manycolorswi’s resource on painting and home ambiance explains how color selection and sheen level interact with natural light and room proportion. Selecting paint before flooring is ordered also prevents color conflicts between wall tones and floor finishes.
Appliance and fixture deliveries need to be coordinated with installation dates, not ordered to arrive weeks early. A refrigerator sitting in a hallway for three weeks blocks traffic, risks damage, and creates liability. Schedule deliveries within 48 hours of the installation appointment. Final cleanup, touch-up painting, and hardware tightening close out the finish phase before the punch list walkthrough begins.
Key takeaways
A successful interior renovation depends on executing each phase in the correct order, from permits and rough-ins through finishes and final inspections, with no shortcuts between gates.
Point | Details |
Sequence is non-negotiable | Each phase depends on the previous one; skipping steps forces expensive rework. |
Permits protect your investment | Unpermitted structural, electrical, or plumbing work creates fines and resale complications. |
Order materials before demolition | Long lead-time items ordered late are the leading cause of project stalls. |
Finish work has a strict order | Paint before flooring, cabinets before countertops, fixtures last to prevent damage. |
Buffer time is mandatory | Add 20 percent time contingency to every phase to absorb inspection delays and backorders. |
What I’ve learned managing renovations that most guides won’t tell you
Most renovation guides focus on the happy path. Here is what I have seen go wrong repeatedly on real projects.
The single most expensive mistake homeowners make is finalizing a design after demolition starts. Once walls are open, the temptation to change the layout is overwhelming. Every change at that stage costs three to five times what it would have cost on paper. I tell every client: make your last design decision before the first wall comes down, not after.
The second issue is underestimating the permit timeline. In Milwaukee and many other cities, permit approvals for electrical and plumbing work can take three to four weeks. Homeowners who start demolition before the permit is approved are gambling. If the inspector flags a problem with the scope, you may be required to restore what you demolished before the permit is issued. That is a real outcome I have seen.
Third, do not skip the third-party final inspection to save a few hundred dollars. Contractors do excellent work, but they also have blind spots on their own projects. An independent inspector reviewing completed mechanical work, drywall, and finishes before the final payment is the cheapest insurance you can buy. I have seen that single step catch $8,000 worth of deficiencies on a $40,000 project.
Finally, the renovation planning guide you build before day one is worth more than any tool or material on the job site. Time spent planning is never wasted. Time spent fixing avoidable mistakes always is.
— Ricco
Start your renovation the right way with Manycolorswi

Manycolorswi brings experienced project management and skilled tradespeople to residential and commercial renovation projects across Milwaukee. Whether you need flooring, drywall, painting, or full interior remodeling, the team at Many Colors coordinates every phase from permits through final walkthrough so nothing falls through the cracks. Every project also supports a mission worth backing: Manycolorswi trains and employs individuals who deserve a second chance, delivering quality work while building stronger communities. If you want a renovation done in the right order, by people who take pride in the outcome, reach out to Manycolorswi to discuss your project today.
FAQ
What does the interior renovation process involve?
The interior renovation process involves sequential phases: planning and design, permitting, demolition, mechanical rough-ins, insulation and drywall, interior finishes, and final inspections. Each phase must be completed in order to avoid rework and code violations.
How long does a typical interior renovation take?
Timeline depends on scope, but a single-room renovation typically runs four to eight weeks when permits, inspections, and material lead times are factored in. Adding a 20 percent time buffer to any contractor estimate is standard practice for realistic scheduling.
What renovations require a permit?
Structural changes, electrical wiring, plumbing rough-ins, and HVAC installations all require permits in most municipalities. Cosmetic work such as painting, flooring replacement, and cabinet swaps generally does not require a permit.
Why does paint come before flooring in the finish stage?
Paint is applied before flooring to prevent drips, overspray, and scuffs from damaging finished floor surfaces. Reversing this order routinely results in refinishing or replacing flooring, which costs significantly more than masking floors during painting.
What happens if you skip permits on a renovation?
Skipping required permits can result in municipal fines, mandatory demolition of completed work, and serious complications when selling the property. Buyers’ lenders and home inspectors identify unpermitted work, and the cost of remediation falls on the seller.
Recommended
Comments